
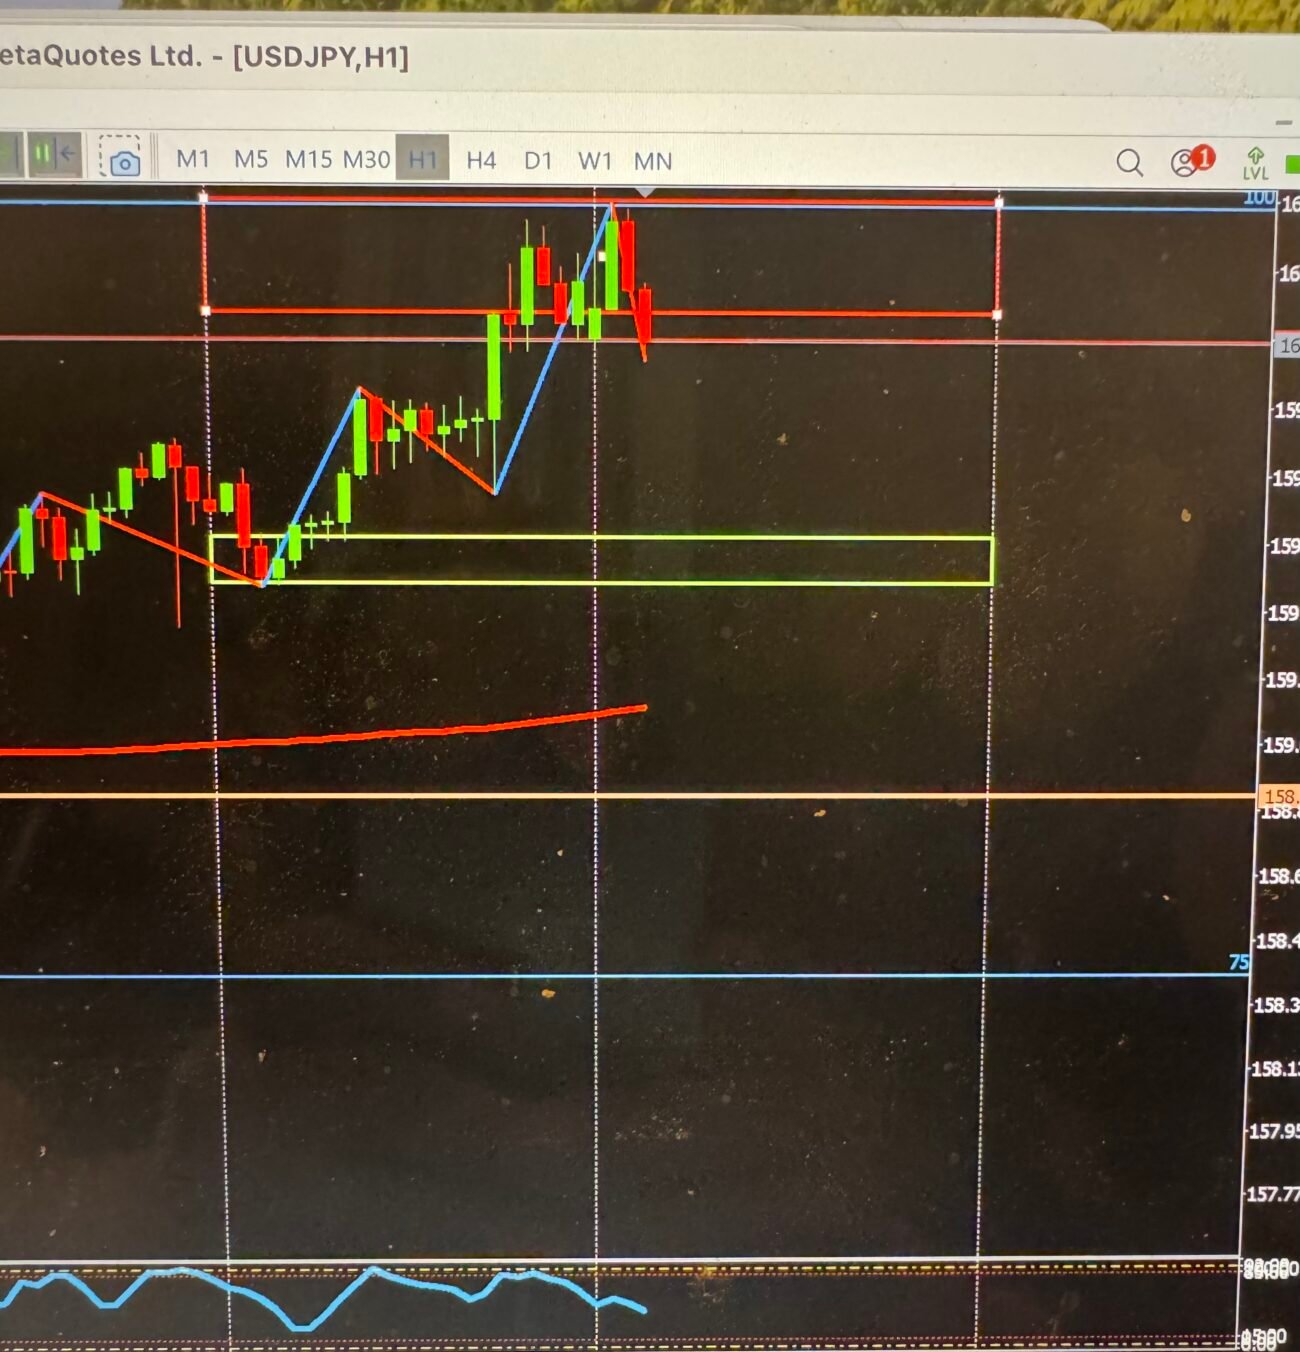
On the USDJPY 1-hour chart, price has already made its move.
It pushed into a premium area, respected the zone, and has now broken below the bottom of the sell zone.
That tells us one thing clearly:
👉 The market has shifted from positioning… to execution.
But this is exactly where most traders get tripped up — they try to enter too early.
We don’t do that.

Reading the Chart Clearly
- Price pushed into the upper sell zone (premium area)
- Showed rejection at the highs
- Then broke below the lower boundary of the zone
- Now moving away from it
This is not the entry.
This is the setup forming.
BRACE Method in Action
B — Break
✔️ Confirmed
Price has already broken structure to the downside.
Sellers are in control.
Bias = Sell only
R — Retest (This Is Where We Are Now)
Now we wait.
Price should come back into the sell zone.
That previous zone should now act as resistance.
If price does NOT return?
👉 No trade.
A — Adjust (If Price Pushes Higher)
If price pushes higher before giving confirmation:
- Adjust the zone to the new high
- Stay focused on sells in premium
- Do NOT flip bias
We stay aligned with structure — not emotion.
C — Confirmation
Once price returns to the zone, we look for:
- Rejection wicks
- Slowing momentum
- Smaller-bodied candles
No confirmation = no entry.
E — Entry
Entry comes after confirmation.
That’s how you stay out of bad trades and in the right ones.
What Happens Next
1. Retest + Rejection → Sell Setup
This is the ideal scenario.
Let price come to you.
2. No Retest → Price Drops Without You
Let it go.
Chasing is expensive.
Discipline pays.
Final Perspective
The break already happened.
Now the only thing that matters is patience.
You’re not here to catch every move —
You’re here to catch the right move.