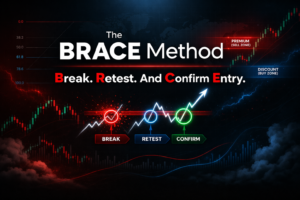
The State of Mind Trader Method

A Rules-Based 4-Hour Opening Range Break (ORB) & Retrace Approach


Method Overview

The State of Mind Trader Method is a rules-based forex trading methodology designed to be executed on the 4-hour timeframe. The method focuses exclusively on Opening Range Breakout (ORB) structure, directional bias using the 200 SMA, and high-quality retracements into the 100 SMA or prior ORB structure.

This method eliminates unnecessary complexity and prioritizes clarity, confirmation, and patience. Trades are only taken when price demonstrates clear intent through breakout, retracement, and time-based confirmation — not anticipation.


Core Principles of the Method

The State of Mind Trader Method is built on a small number of intentional principles. Each principle exists to reduce noise, remove emotional decision-making, and create a repeatable process that can be applied consistently across market conditions.

  • One primary timeframe: 4-Hour – The method is designed to be traded exclusively on the 4-hour timeframe. This timeframe provides a balance between structure and opportunity, filtering out much of the intraday noise found on lower timeframes while still offering frequent, high-quality trade setups.

    By focusing on a single primary timeframe, the method eliminates confusion caused by conflicting signals across multiple charts. The 4-hour chart allows the trader to clearly observe breakout behavior, retracement structure, and directional intent without constant screen monitoring.

    This focus supports patience, consistency, and disciplined execution.

  • One structural framework: ORB – All trade decisions within the method are structured around the Opening Range Breakout (ORB). The ORB defines a clear area of consolidation, expansion, and re-entry, giving price context rather than isolated signals.

    The ORB serves three key purposes:

    • Identifying when price commits to a direction

    • Defining when price has moved too far to chase

    • Providing a framework for controlled retracements

    By using a single structural framework, the method ensures that every trade is taken within a defined market environment, rather than in isolation.

  • One trend filter: 200 SMA – The 200 SMA acts as the primary trend and directional bias filter. Trades are only taken in the direction of price relative to this level, ensuring alignment with the broader market structure.

    • When price is above the 200 SMA, only buy scenarios are considered

    • When price is below the 200 SMA, only sell scenarios are considered

    This rule prevents countertrend trading and removes the temptation to predict reversals. The 200 SMA provides a simple, objective way to define market bias without over-analysis.

  • One retracement zone: 100 SMA or prior ORB – The method focuses on deeper, higher-quality retracements rather than shallow pullbacks. Trades are only considered when price retraces into either:

    • the 100 SMA zone, or

    • a previous ORB structure

    These areas tend to attract stronger participation and provide clearer reactions than shallow retracements. By limiting entries to these zones, the method prioritizes quality over frequency and improves risk-to-reward potential.

    Shallow pullbacks are intentionally ignored to reduce false starts and emotional entries.

  • Time-based confirmation before execution – Trade execution is never immediate. After a new 4-hour candle begins printing, the method requires a 30-minute to 1-hour waiting period before an entry can be considered.

    This time-based confirmation allows the trader to:

    • Observe early candle behavior

    • Identify bullish or bearish intent

    • Avoid reacting to initial volatility or false moves

    Waiting for a portion of the candle to form ensures that trades are based on confirmed intent, not assumption or impulse.

  • Walk-away rules when conditions are not met – An essential part of the State of Mind Trader Method is knowing when not to trade. If all conditions are not met within the defined execution window, the setup is considered invalid by time, and the trade is intentionally skipped.

    Walking away is not viewed as a missed opportunity, but as a rule-based decision that protects capital and mental discipline. This principle reinforces patience and prevents forced trades in unclear or deteriorating conditions.

    Consistency is built not only by taking good trades, but by avoiding bad ones.

Every rule exists to reduce emotional decision-making and improve execution consistency.


Chart Setup Requirements

  • Timeframe: 4-Hour (4H)

  • Indicators:

    • 200 Simple Moving Average (trend bias)

    • 100 Simple Moving Average (retracement zone)

  • Structure:

    • Clearly defined 4H ORB

This method should not be traded without a properly marked ORB and moving averages.


Buy Trade Setup

4-Hour ORB Breakout & Retrace

Buy Bias Conditions (All Must Be Met)

1. Price is above the 200 SMA
The 200 SMA defines bullish directional bias. Buy trades are only considered when price is trading above this level, ensuring alignment with higher-probability market structure.


2. Price breaks and closes above the ORB
A valid buy scenario requires price to break and close above the ORB, confirming bullish participation and commitment beyond the established range.


3. Price closes back inside the ORB
After the breakout, price must retrace and close back inside the ORB. This step confirms a transition from impulse to retracement and prevents chasing extended price.


4. The previous closed candle is bearish (red)
A bearish close within the ORB signals that price has pulled back sufficiently against the bullish direction. This retracement behavior is required before a buy is considered.


Buy Execution Rules

5. Execution timing
After the next 4-hour candle begins to print, wait 30 minutes to 1 hour before considering entry. This allows time to confirm whether the candle is showing buying intent.


6. Entry condition
If, after the waiting period, the current candle is showing buying intent (green), a buy trade may be executed.

If the candle is showing selling intent, no trade is taken.


Special Buy Scenarios (Continuation Rules)

If price breaks and closes below the ORB, a buy trade may still be considered only if one of the following occurs:

  • Price retraces to or closes inside the 100 SMA zone, or

  • Price retraces to or closes inside the previous ORB structure

In these scenarios, all execution timing and confirmation rules still apply.


Sell Trade Setup

4-Hour ORB Breakout & Retrace

Sell Bias Conditions (All Must Be Met)

1. Price is below the 200 SMA
The 200 SMA defines bearish directional bias. Sell trades are only considered when price is trading below this level.


2. Price breaks and closes below the ORB
A valid sell scenario requires price to break and close below the ORB, confirming bearish participation beyond the established range.


3. Price closes back inside the ORB
After the breakout, price must retrace and close back inside the ORB, signaling a pause and retracement rather than continuation.


4. The previous closed candle is bullish (green)
A bullish close within the ORB confirms a retracement against bearish direction, which is required before a sell is considered.


Sell Execution Rules

5. Execution timing
After the next 4-hour candle begins to print, wait 30 minutes to 1 hour before considering entry.


6. Entry condition
If, after the waiting period, the current candle is showing selling intent (red), a sell trade may be executed.

If the candle is showing buying intent, no trade is taken.


Special Sell Scenarios (Continuation Rules)

If price breaks and closes above the ORB, a sell trade may still be considered only if one of the following occurs:

  • Price retraces to or closes inside the 100 SMA zone, or

  • Price retraces to or closes inside the previous ORB structure

All execution timing and confirmation rules still apply.


Risk Management Guidelines

  • Risk must be defined before entry

  • Stop loss is placed beyond the most recent swing structure

  • Minimum risk-to-reward: 1:1

  • Preferred risk-to-reward: 1:2

  • No trade is better than a forced trade


Final Notes on Execution

The State of Mind Trader Method is designed to:

  • Reduce overtrading

  • Eliminate impulsive entries

  • Prioritize structure over speed

  • Reward patience and discipline

If conditions are not met within the execution window, the trade is invalid by time and is intentionally skipped.